How to Use GST Online Seller Tool
Step-by-step guide on using the GST Online Seller Tool in GST Tool to simplify eCommerce GST compliance. Learn to import data, generate GSTR-1, and file returns effortlessly.
1 year ago
Written by GST Tool Team
The GST Online Seller Tool by GST Tool is designed to simplify GST compliance for eCommerce sellers. This guide will walk you through the process, from accessing the tool to generating and downloading the GSTR-1 JSON file for filing on the GST portal.
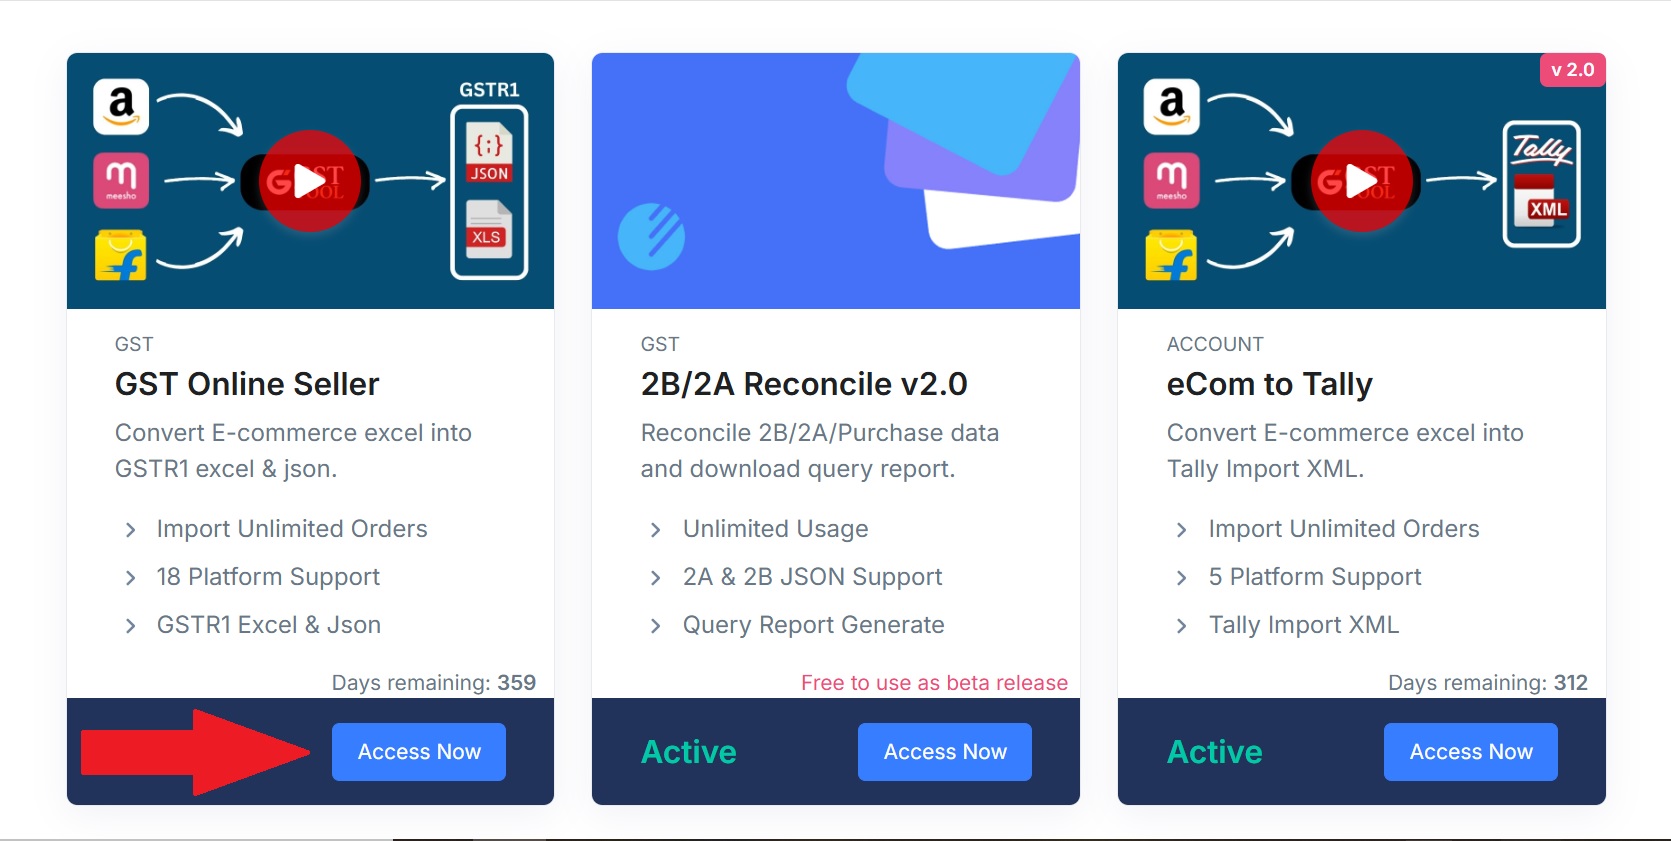
Step 1: Access the GST Online Seller Tool
- Log in to the Dashboard:
- After logging in to your GST Tool account, navigate to the dashboard.
- Locate the GST Online Seller Tool:
- Find the “GST Online Seller Tool” section.
- Click the Access Now button.
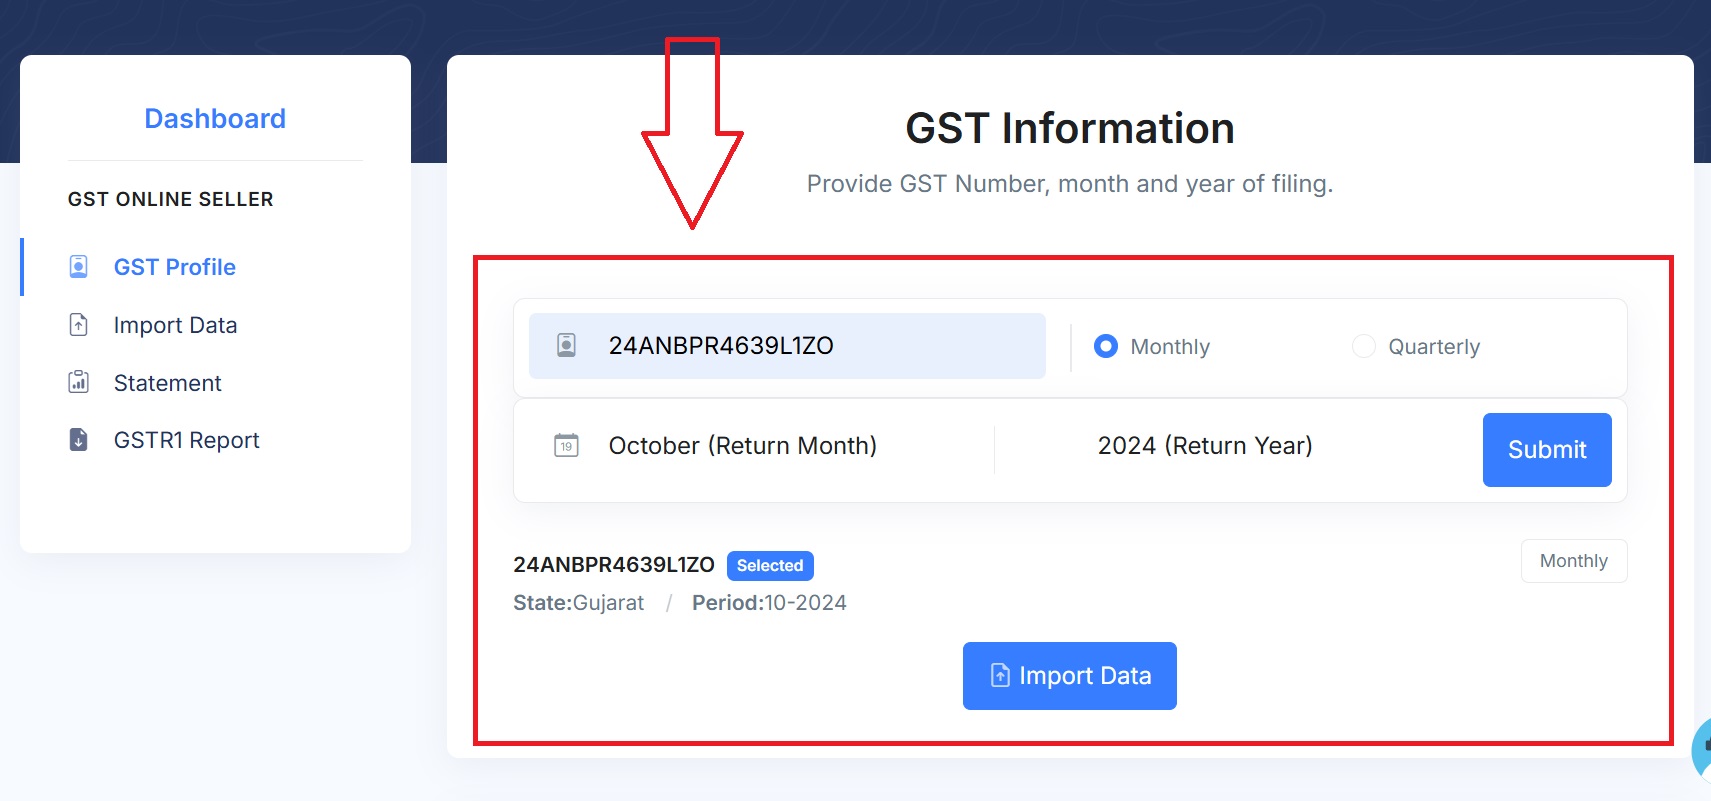
Step 2: Provide GST Information
- Enter GST Details:
- Input your GSTIN and return month and year.
- Click Submit to proceed.
- Click Import Data to go to upload page.
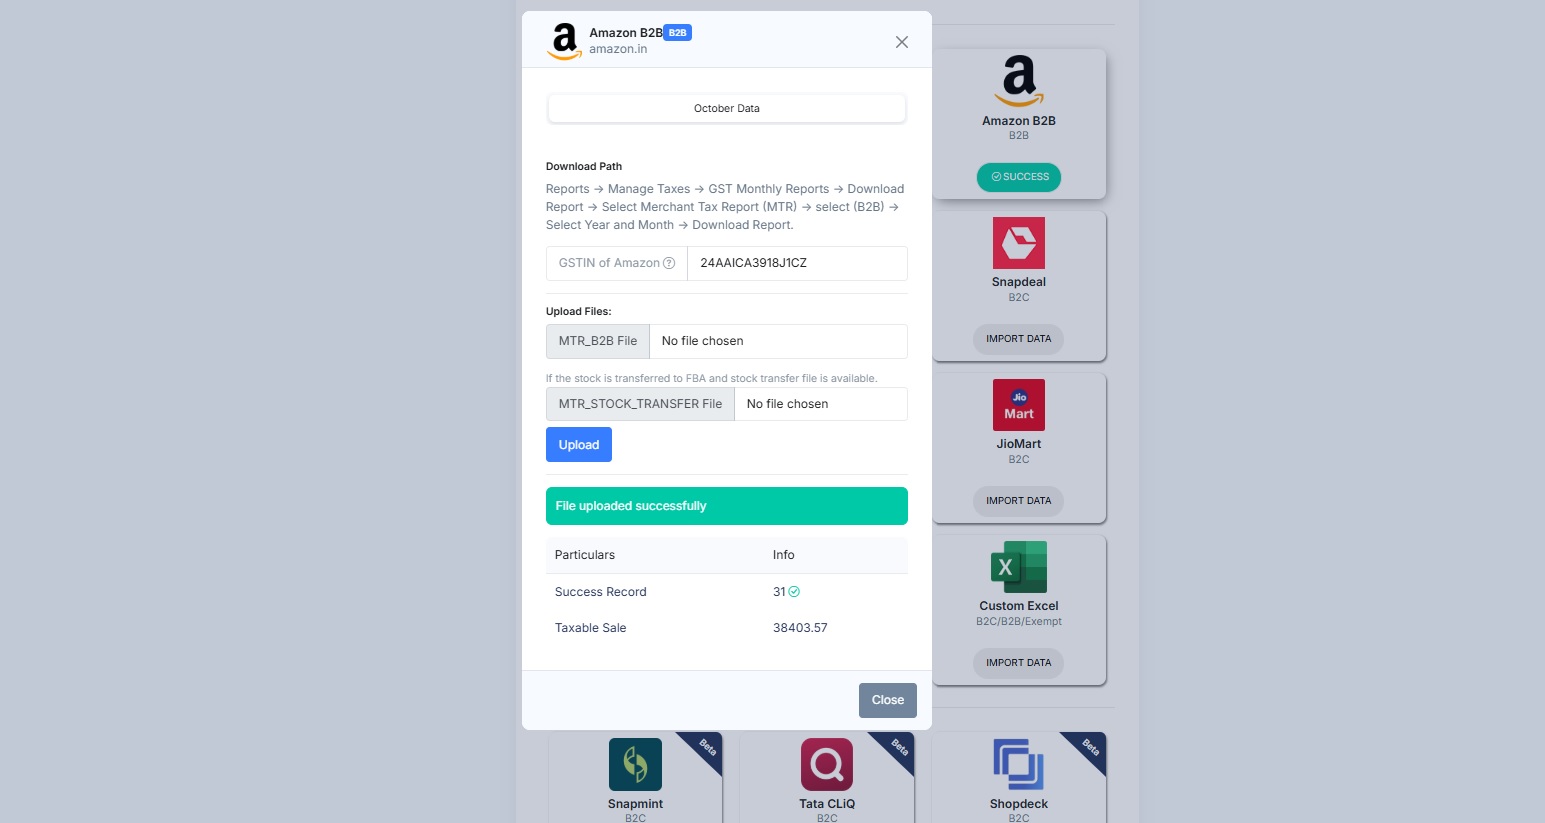
Step 3: Import Data for Your eCommerce Platform
- Choose Your eCommerce Platform:
- Select your platform (e.g., Flipkart, Amazon, Meesho, Jio) from the available options. and click Import Data button
- Download the Data File:
- Follow given Download Path steps to download data from your eCommerce platform.
- Upload the Data File:
- Go back to the GST Online Seller Tool.
- Click Upload Files option and upload the file you downloaded from your eCommerce platform.
- Verify Import Status:
- Once the data is imported, check the status to confirm a successful upload.
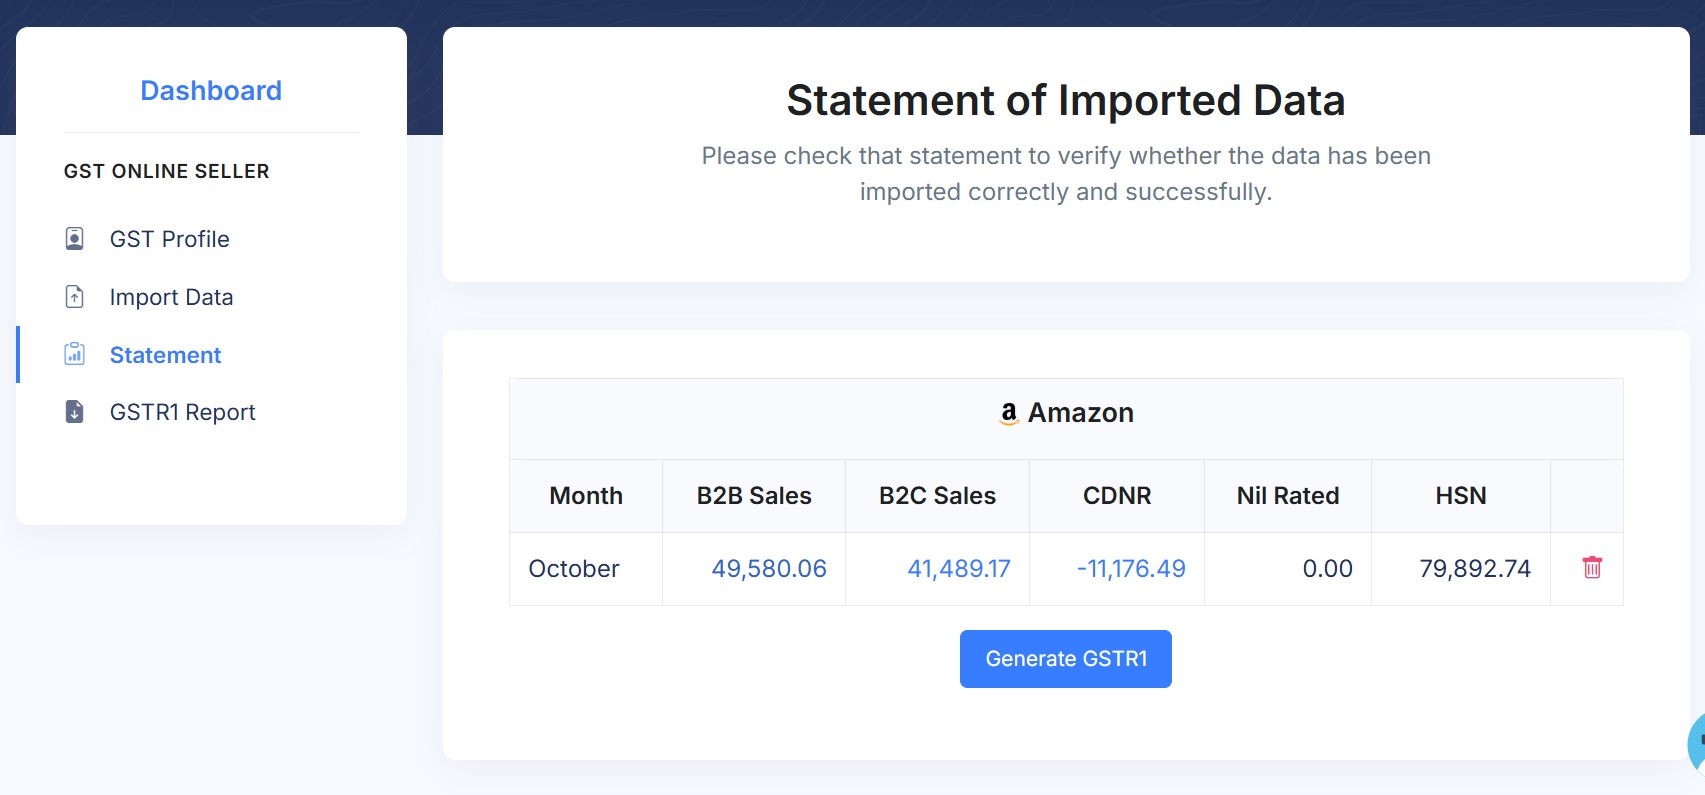
Step 4: Check Imported Data in the Statement Section
- Navigate to the Statement Section:
- Go to the Statement section in the GST Online Seller Tool.
- Verify Imported Amounts:
- Review the imported data, including B2B Sales, B2C Sales, CDNR, Nil Rated, and HSN amounts.
- Ensure that the amounts match the TCS data reported on the GST Portal by your eCommerce platform.
- If needed, you can delete data and edit any invoice.
Step 5: Generate GSTR-1
- Generate GSTR-1 Report:
- Click Generate GSTR-1 to compile the data into the required format.
- Enable B2C HSN Data:
- In the GSTR-1 settings, enable the B2C HSN option if you want to include B2C HSN data in the GSTR-1 file.
- Review the GSTR-1 Report:
- Check the report for accuracy, ensuring that all transactions are included.
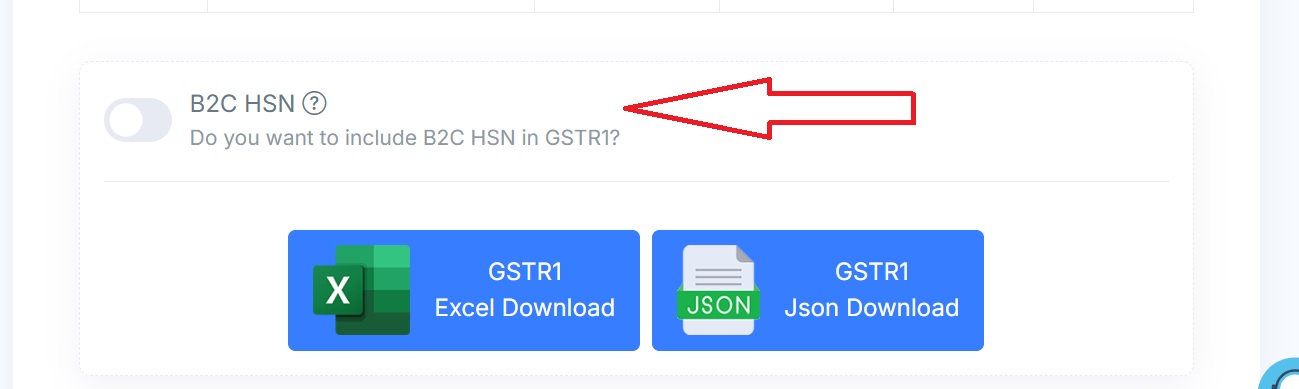
Step 6: Download GSTR-1 JSON
- Download the JSON File:
- After generating the GSTR-1, click GSTR1 JSON Download to save the file.
- Upload JSON to GST Portal:
- Log in to the GST portal.
- Go to the Returns Dashboard and select the appropriate period.
- Upload the JSON file directly to file your GSTR-1.

By following these steps, you can efficiently use the GST Online Seller Tool in GST Tool to manage your eCommerce GST compliance.
Was this article helpful?
68 out of 115 found this helpful